Editing an Existing Page in Cascade
To edit a page, select the page name in the "Site Content" column (left side of screen), and then choose "Edit" at the top of the page. 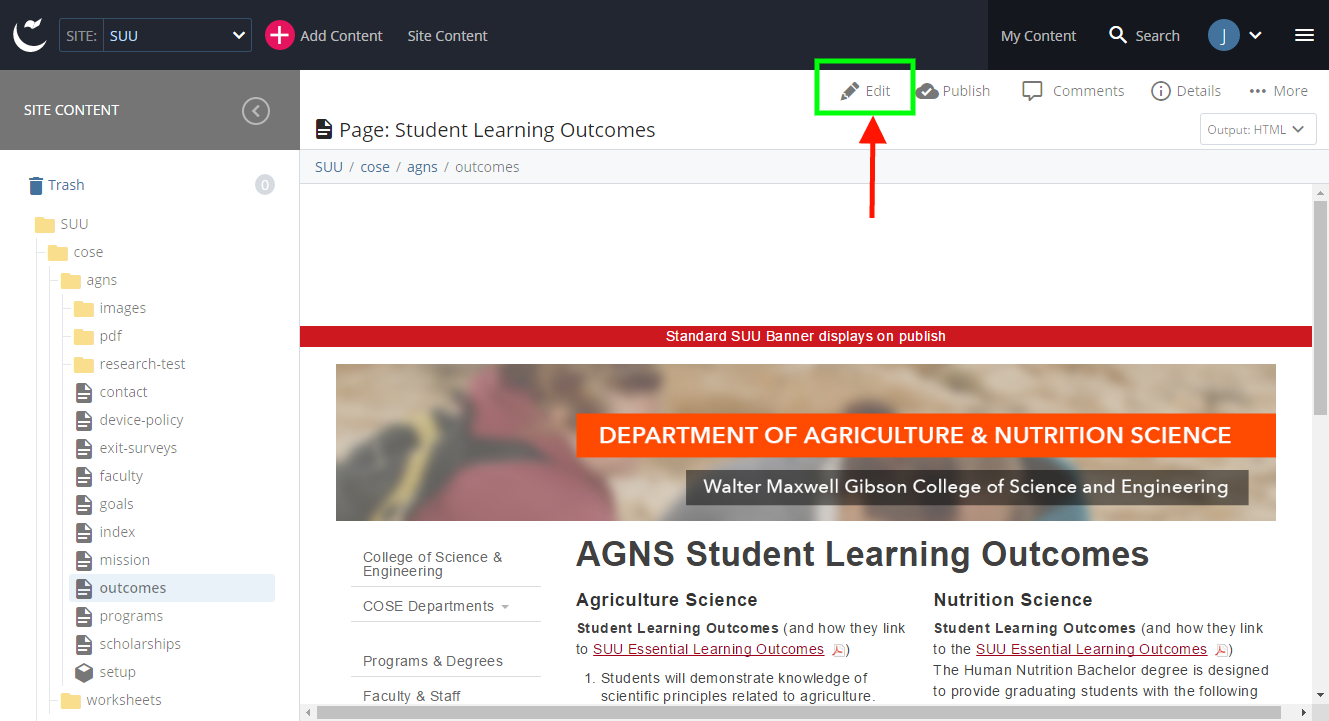
Basic Pages
Basic pages are simple pages with just a box for the page’s content.
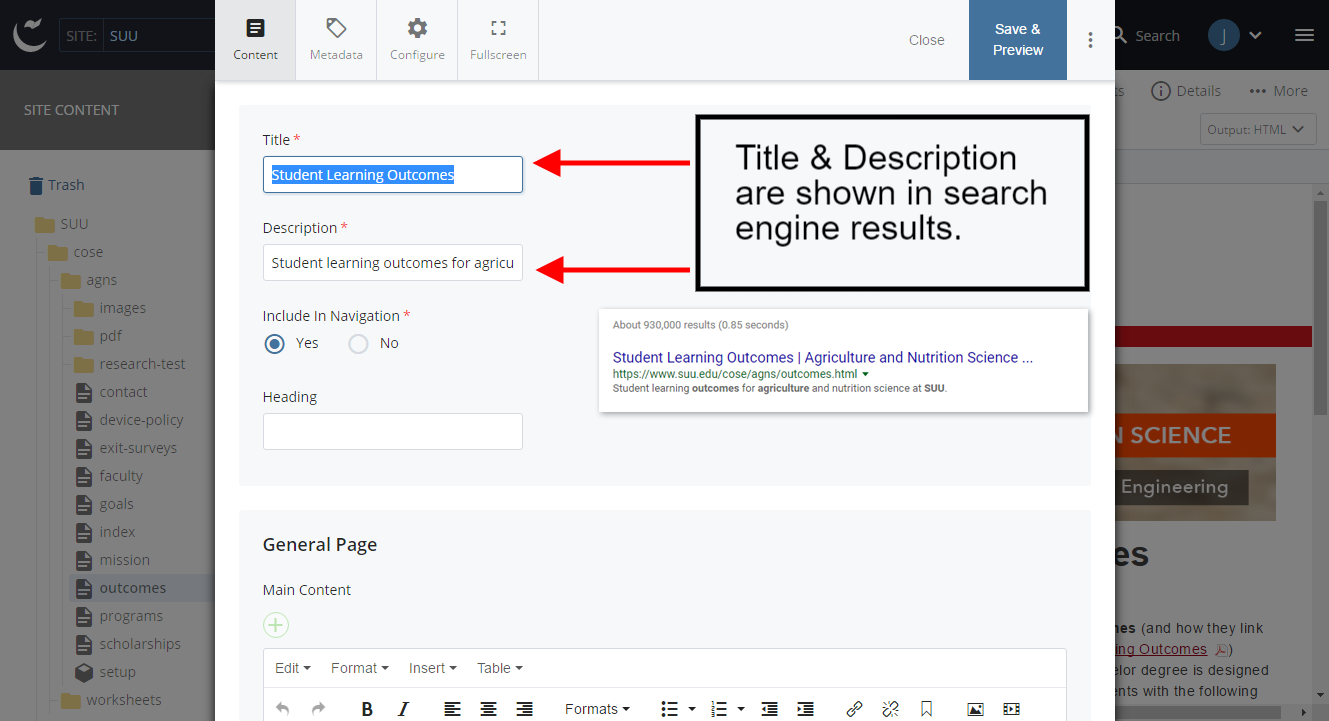
- After selecting the page to edit, you are presented with the edit dialog. Here you will add/edit the title, description, and content of the page. The title and description should contain good keywords that accurately describe the page since this content shows up in search engine results.
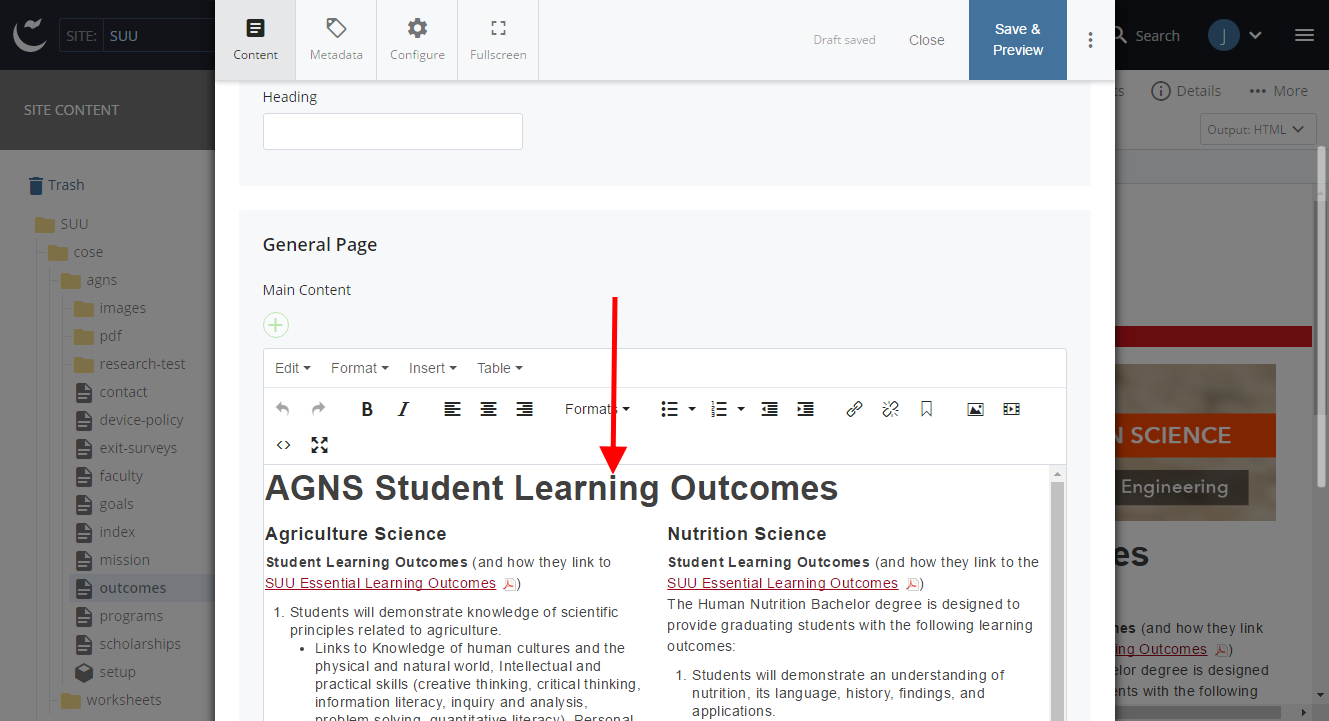
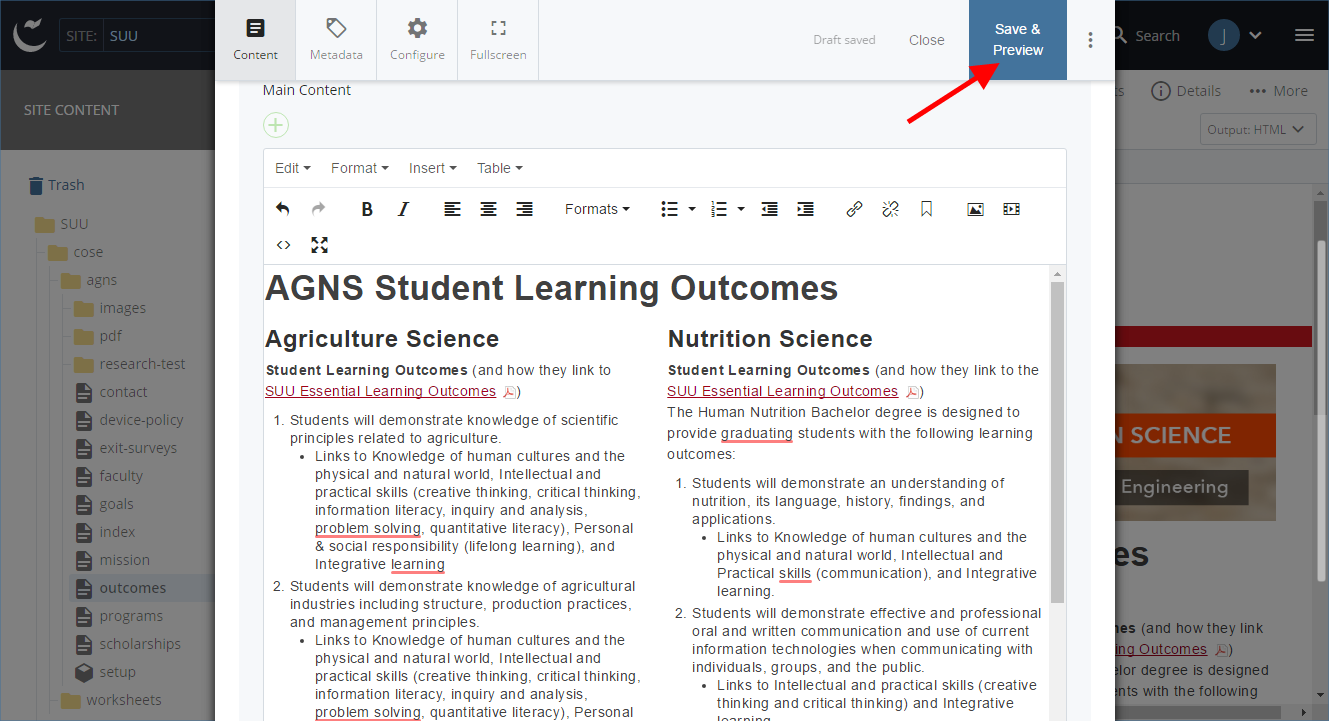
- Once you have completed your edits, choose the "Save & Preview" button in the upper right.
- You will be shown a preview of your page. If the page looks correct, choose Submit and add a comment describing the changes that you made.
Then choose “Check Content & Submit”.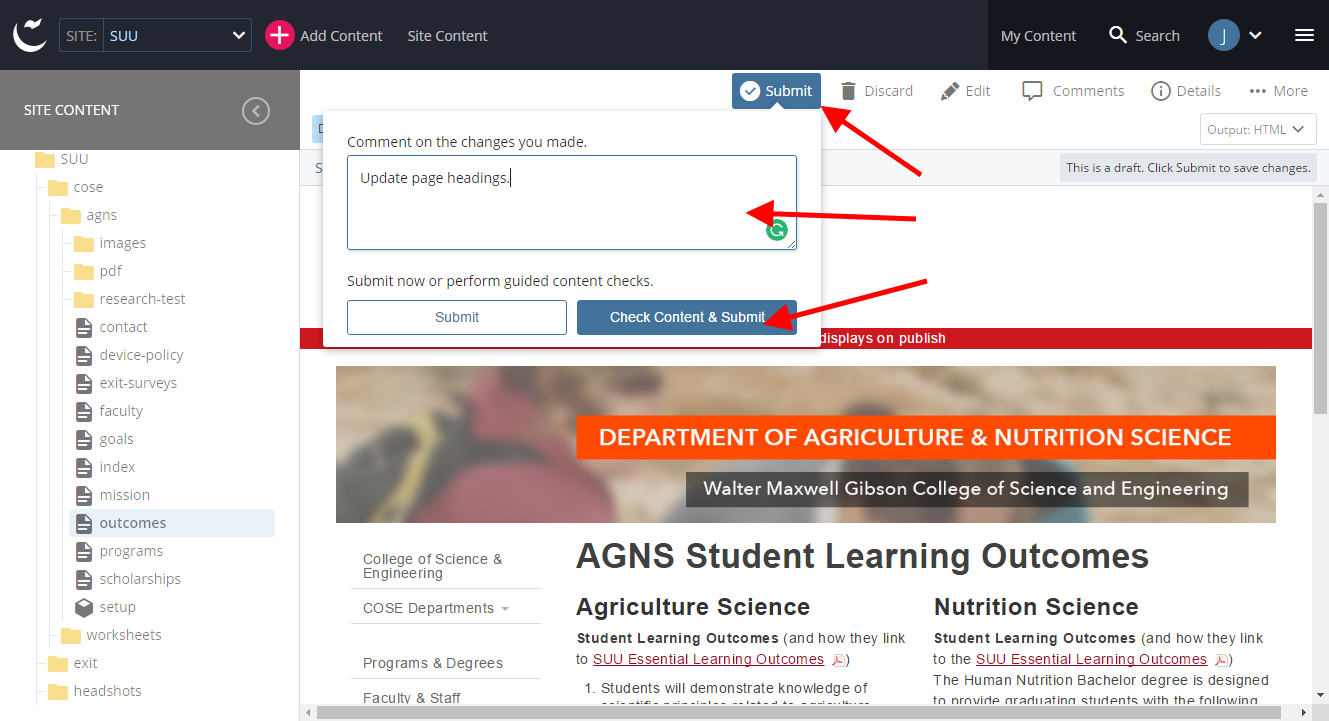
Review any spelling or link issues Cascade finds and confirm your changes.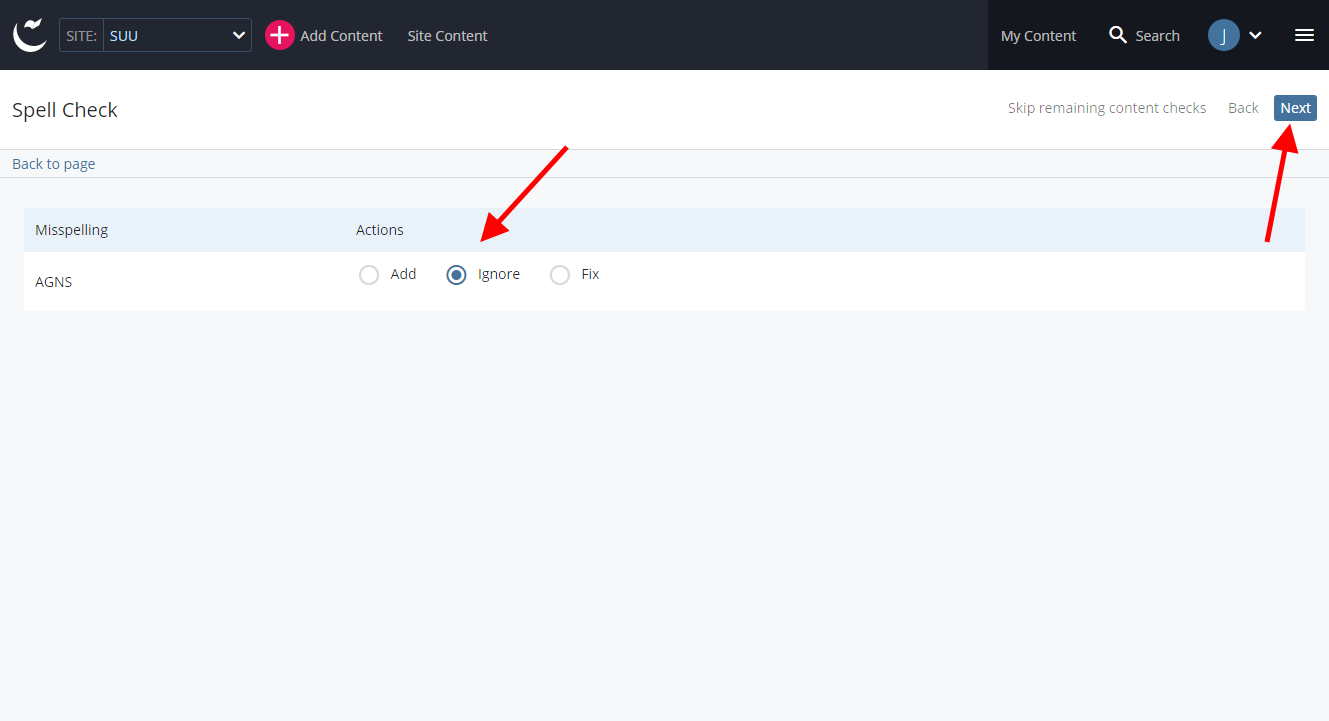
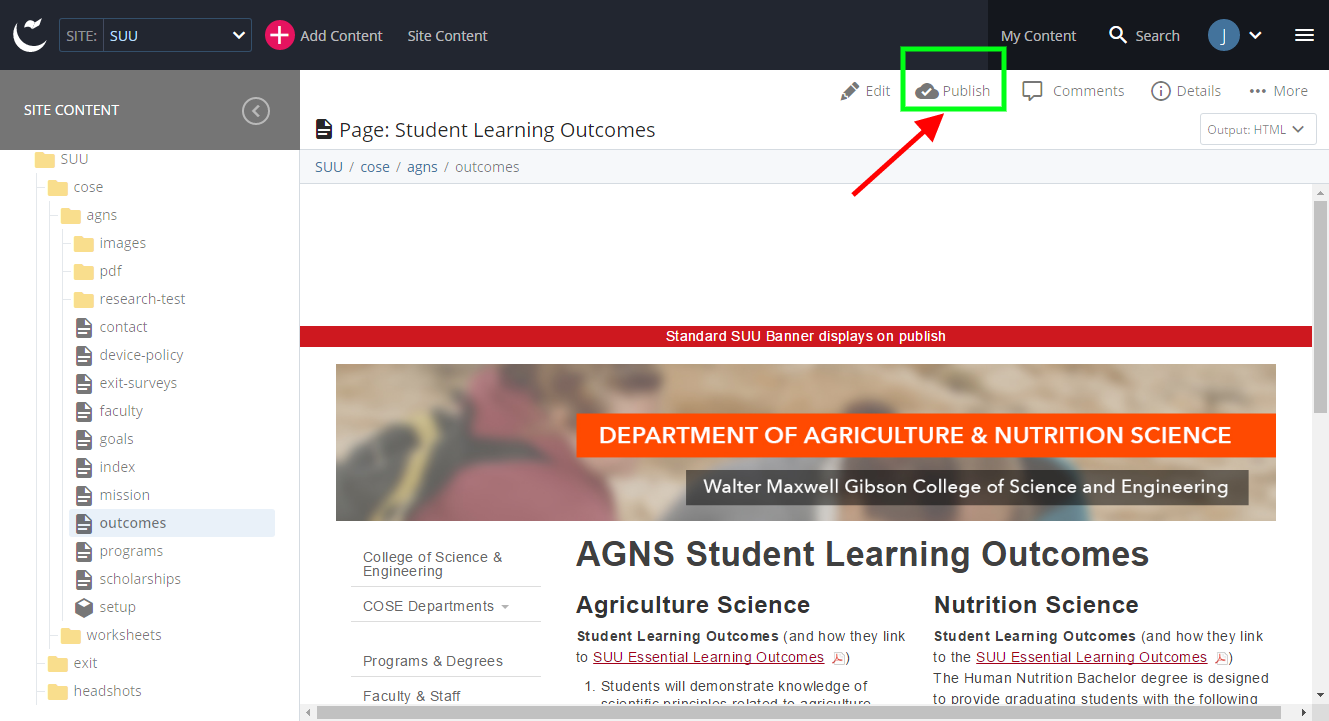
- After you have submitted your changes you need to remember to publish your page to the web server so users can actually see it. Choose the “Publish” button.
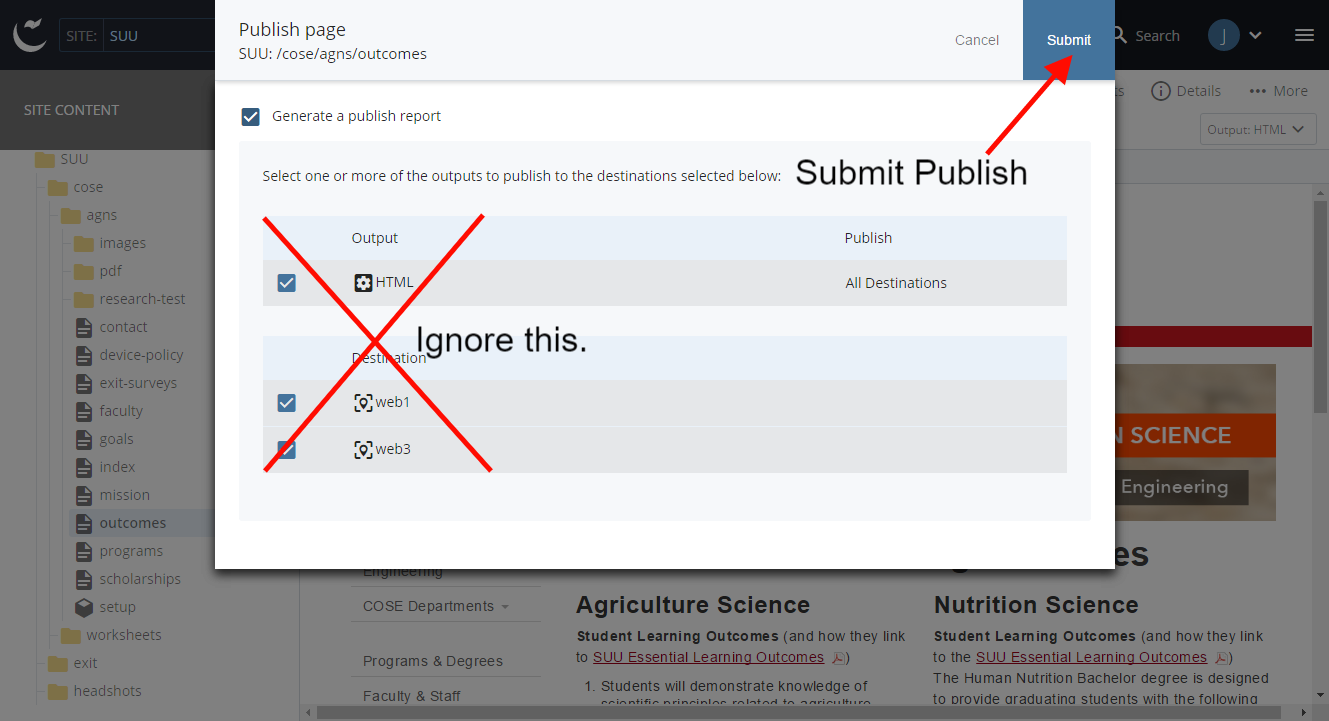
The next box that appears is just confirming the destinations your page is publishing to, you do not need to make any tweaks, just choose Submit.
Advanced Pages
- Advanced pages function in much the same way as Basic pages with the added functionality of being able to manage content in rows and columns.
- After selecting the page to edit, you are presented with the edit dialog. Here you will add/edit the title, description (as outlined in the Basic Page information), and body of the page.
Often the rows/columns will be closed when you begin to edit. If you click on arrow pointing to the right next to the word "Column" it will expand that column to show the editable content. You may need to refer back to your page in a web browser to get an idea of which column is where in the page.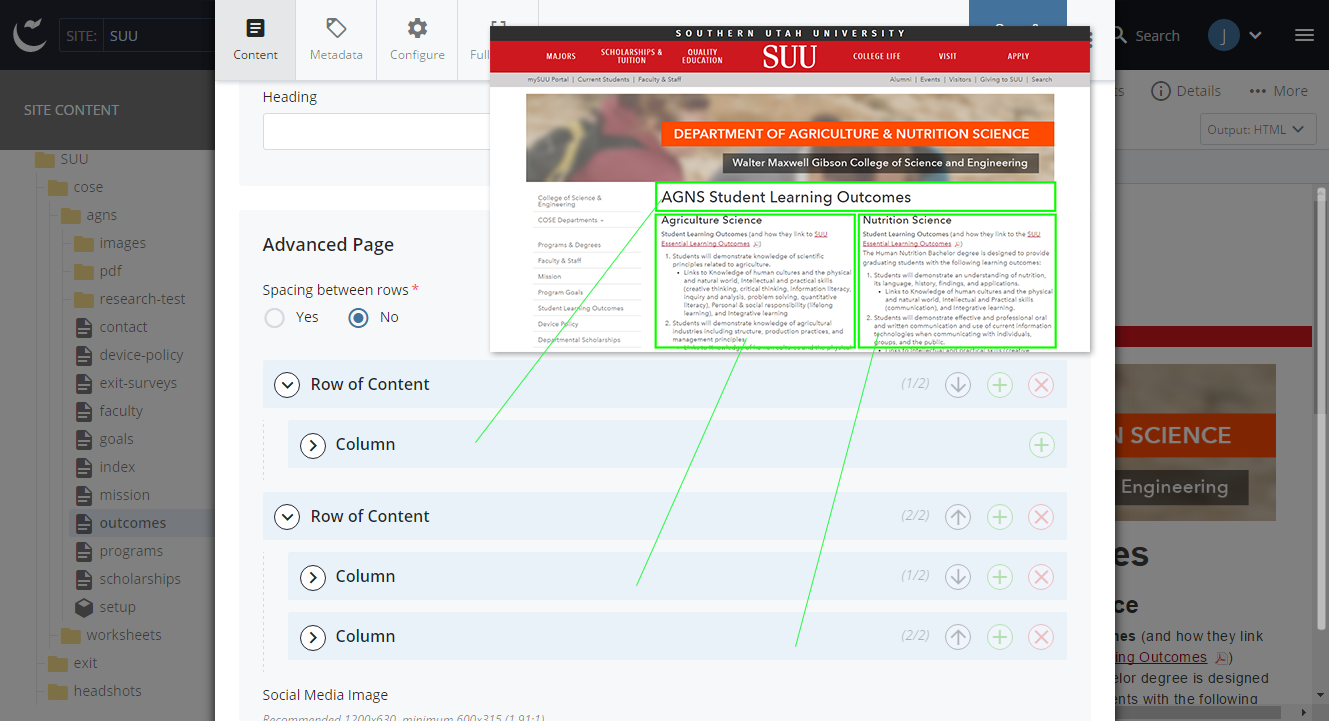
- Follow the same steps to Save/Preview, Submit, Publish as outlined earlier under Basic Pages.
